Creating a client portal for your construction business is a game-changer for streamlining communication, enhancing transparency, and building stronger client relationships. But where do you start, and what features matter most? In this guide, we’ll walk you through the steps to build a user-friendly, efficient client portal tailored to the needs of your construction business and clients using Knack’s no-code platform.
Key Takeaways
- A construction client portal is a secure online platform that allows clients to access real-time project information, communicate with the construction team, and manage essential documents and payments in one place.
- Construction client portals enhance transparency, streamline communication, and cultivate collaboration. This improves overall project management and client satisfaction.
- Effective construction client portals include features for project updates and daily logs, budget and expense tracking, real-time data and communication, document sharing and management, and billing and payments.
What is a Construction Client Portal?
A construction client portal is a secure online platform that allows clients to access key project information and communicate directly with their construction team in real-time. It provides a centralized location for clients to view project updates, timelines, budgets, documents, and images, ensuring they have complete transparency and up-to-date insights into their project’s progress. The overarching goal of a construction client portal is to make project management more efficient and less prone to misunderstandings.
Benefits of Using Client Portals in Construction
Implementing a client portal in your construction business offers numerous benefits for you and your clients, including:
- Enhanced Communication: A client portal centralizes communication, allowing clients and project teams to exchange messages, ask questions, and address concerns directly within the platform.
- Real-Time Project Updates: Clients can access up-to-date information on project milestones, schedules, and any changes, which helps manage expectations and keep everyone aligned.
- Document Management: With a client portal, clients can view, download, and store all essential project documents—such as contracts, permits, and progress reports—in one organized and secure location.
- Increased Transparency: By offering clear visibility into budgets, timelines, and project details, client portals build trust and help clients feel more involved in the construction process.
- Improved Efficiency: A portal eliminates the need for frequent check-ins and reduces time spent on email chains or phone calls, allowing the team to focus more on project execution.
Key Features of a Construction Client Portal
Construction client portals are only effective if they have the right features. While every project’s needs differ, you should consider adding the following features to your portal.
Project Updates and Daily Logs
Daily logs give clients a clear view of the project’s progress through detailed updates, photos, and notes from the construction team. These logs offer clients an easy way to stay informed about each stage, creating a sense of transparency and engagement as they can see the work being done in real-time. This feature helps manage client expectations and builds trust by giving them insight into the day-to-day activities on-site.
Budget and Expense Tracking
Budget and expense tracking features allow clients to monitor financial allocations and stay on top of expenses. They can review project spending and ensure the financial decisions being made align with their goals and budget. This feature reduces the risk of budget-related misunderstandings and helps keep the project on track financially.
Real-Time Data and Communication
Real-time data and communication capabilities keep clients updated on project progress, any changes, and new document uploads as soon as they happen. This reduces the need for constant check-ins and ensures clients are always in the loop. Real-time communication features also allow for faster responses to questions or concerns, minimizing delays and fostering better collaboration.
Document Sharing and Management
Integrating document sharing and management into your construction client portal allows teams to securely upload, share, and edit essential project files, such as contracts, permits, and progress reports. This ensures clients can access critical documents anytime they need, helping streamline workflows and keep everything organized.
Billing and Payment Capabilities
Billing and payment capabilities simplify financial transactions by offering clients a secure way to view invoices, manage billing schedules, and make payments directly within the portal. This feature can include various billing options, such as subscription models, to accommodate different project needs, helping make the payment process easy and transparent.
Step-by-Step Guide to Building Your Construction Client Portal With Knack
Knack is an intuitive no-code platform that enables you to build custom client portal solutions no matter your level of technical expertise using a drag-and-drop interface and pre-built components. In this tutorial, we’ll walk you through three different ways you can use Knack to build your construction portal. We also have a comprehensive knowledge base and developer documentation for more in-depth guidance.
If you don’t already have a Knack account, sign up for our 14-day free trial to follow along.
Option 1: Start With AI
Knack offers an AI app-builder that can be used to build your construction client portal. Here’s how:
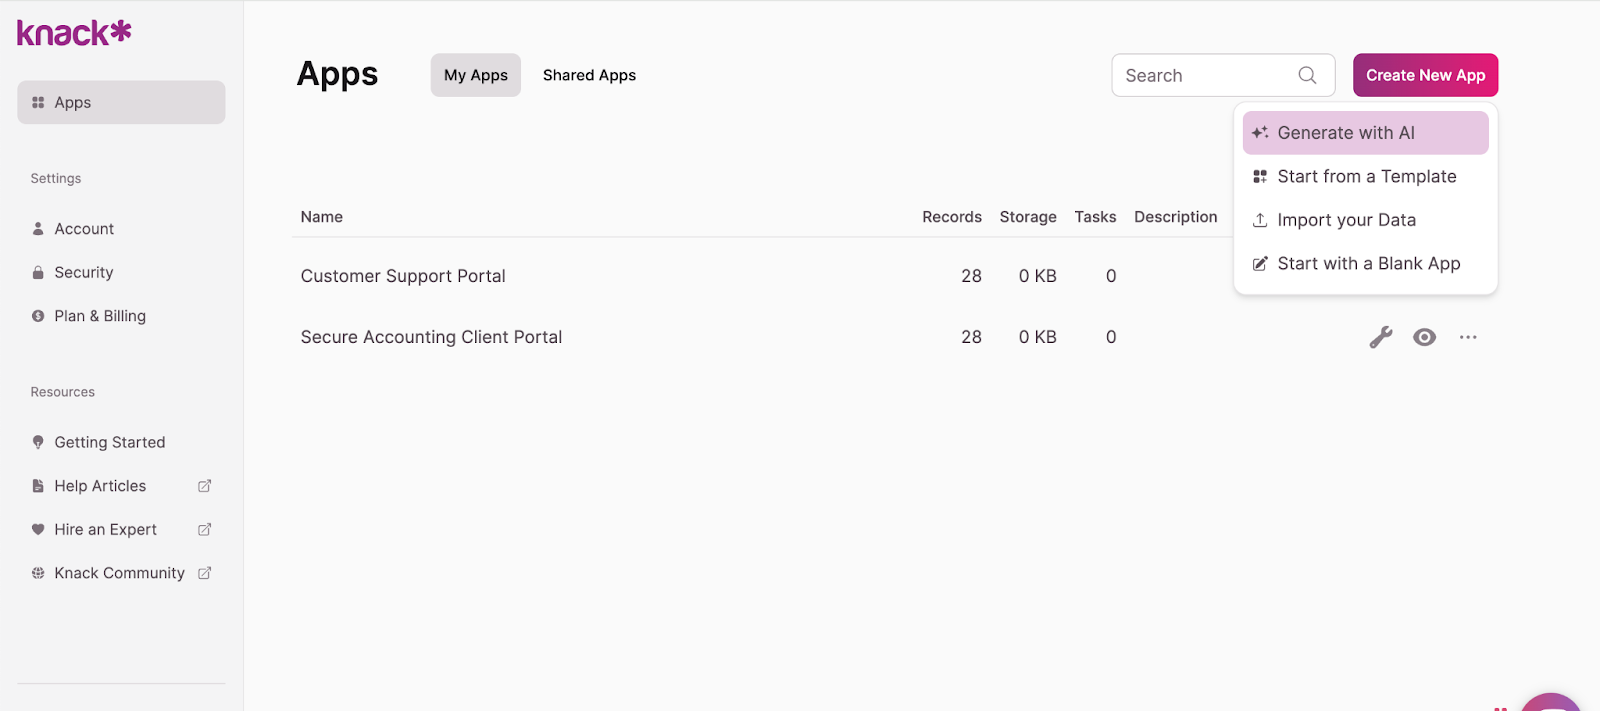
- From the app builder dashboard, click “Create New App” in the top right corner. Select “Start with AI.”
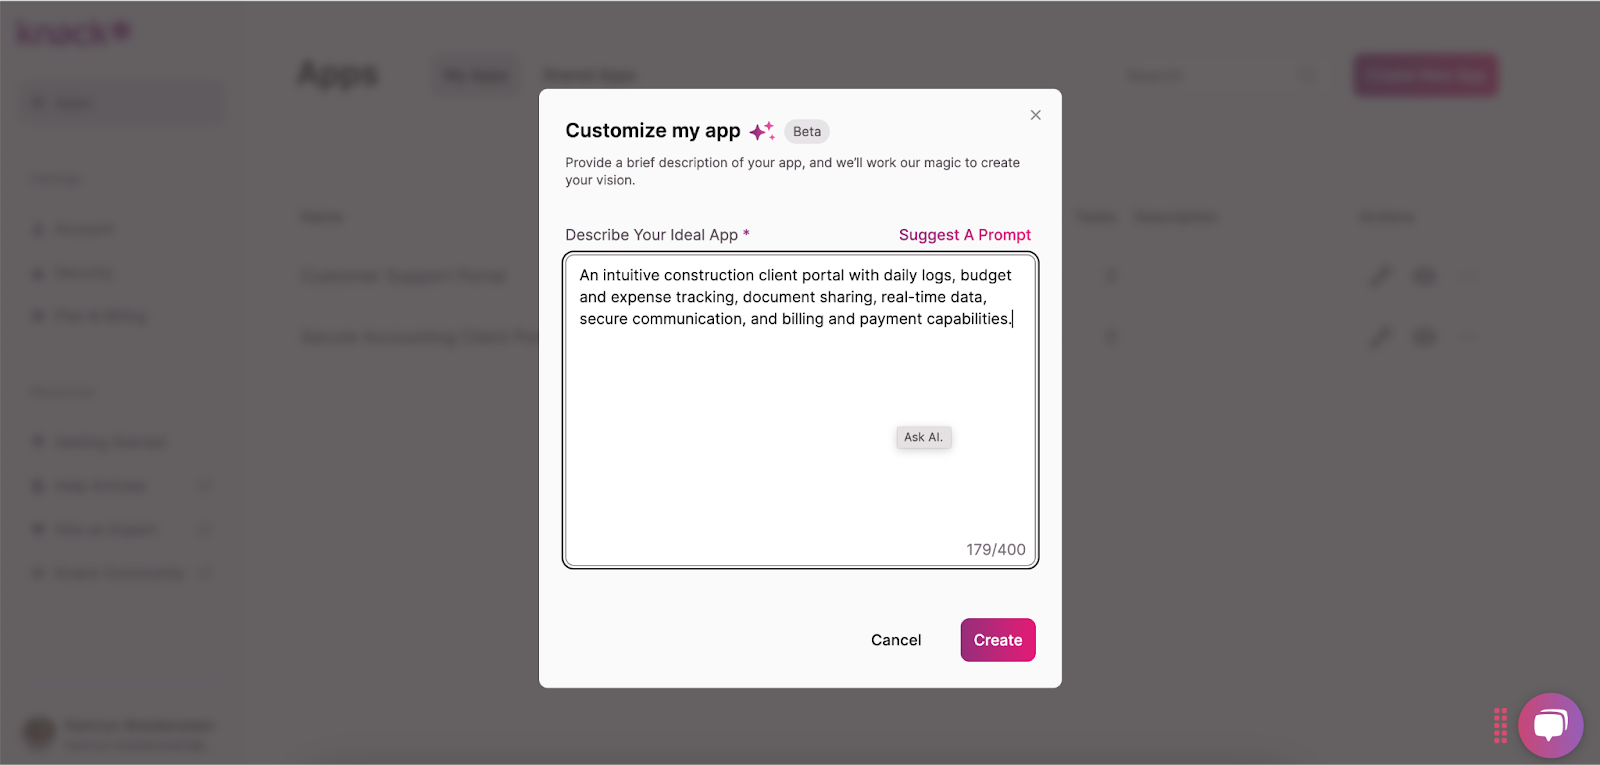
- In the pop-up, clearly describe the solution you want to build. For example: “An intuitive construction client portal with daily logs, budget and expense tracking, document sharing, real-time data, secure communication, and billing and payment capabilities.” The AI will then propose an initial app structure.
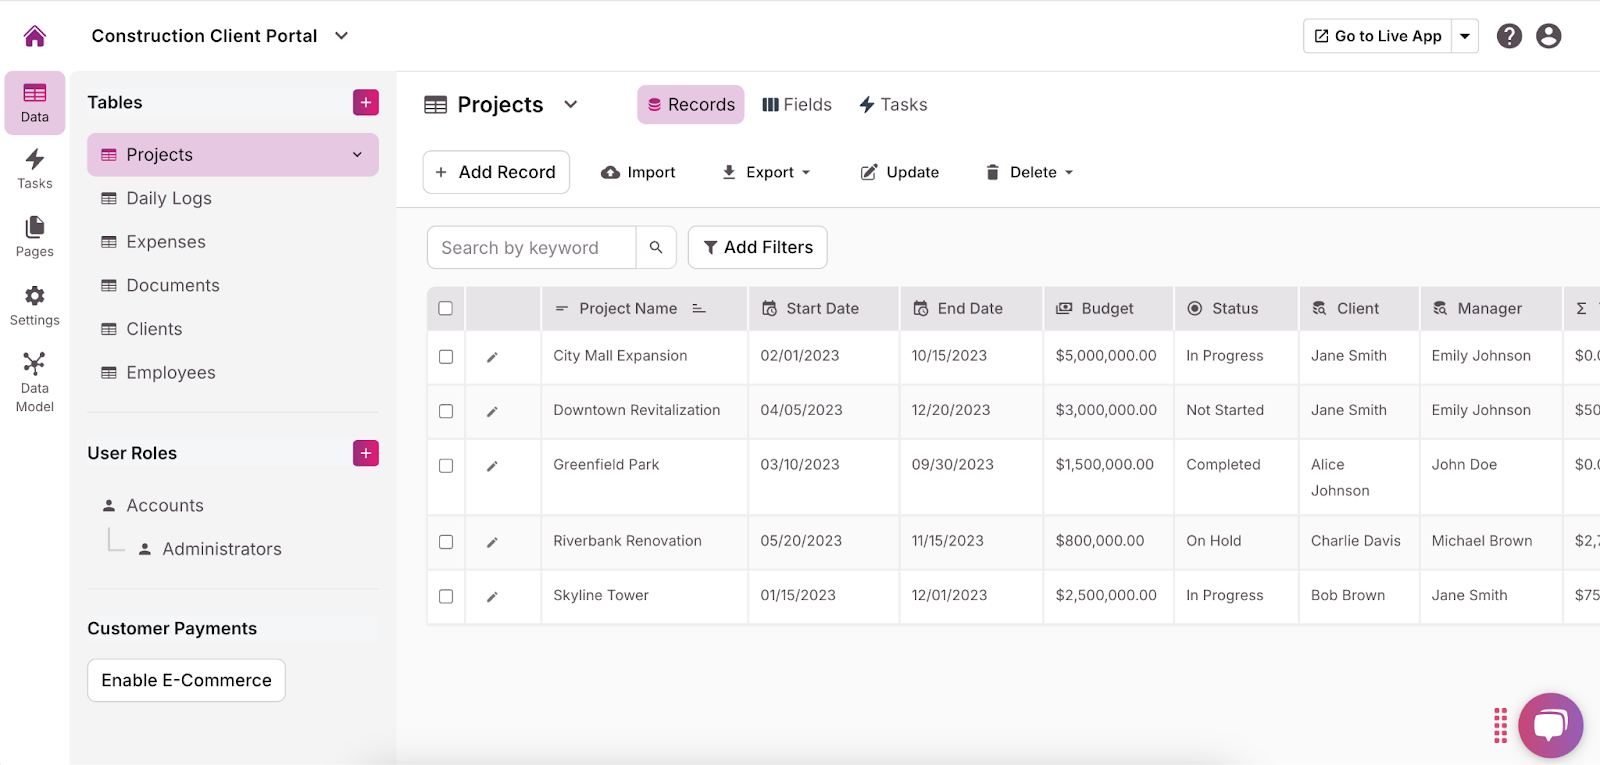
- Explore the suggested structure and edit it to meet your requirements. You can edit, add, or remove tables, fields, connections, pages, and views using the menu to the left.
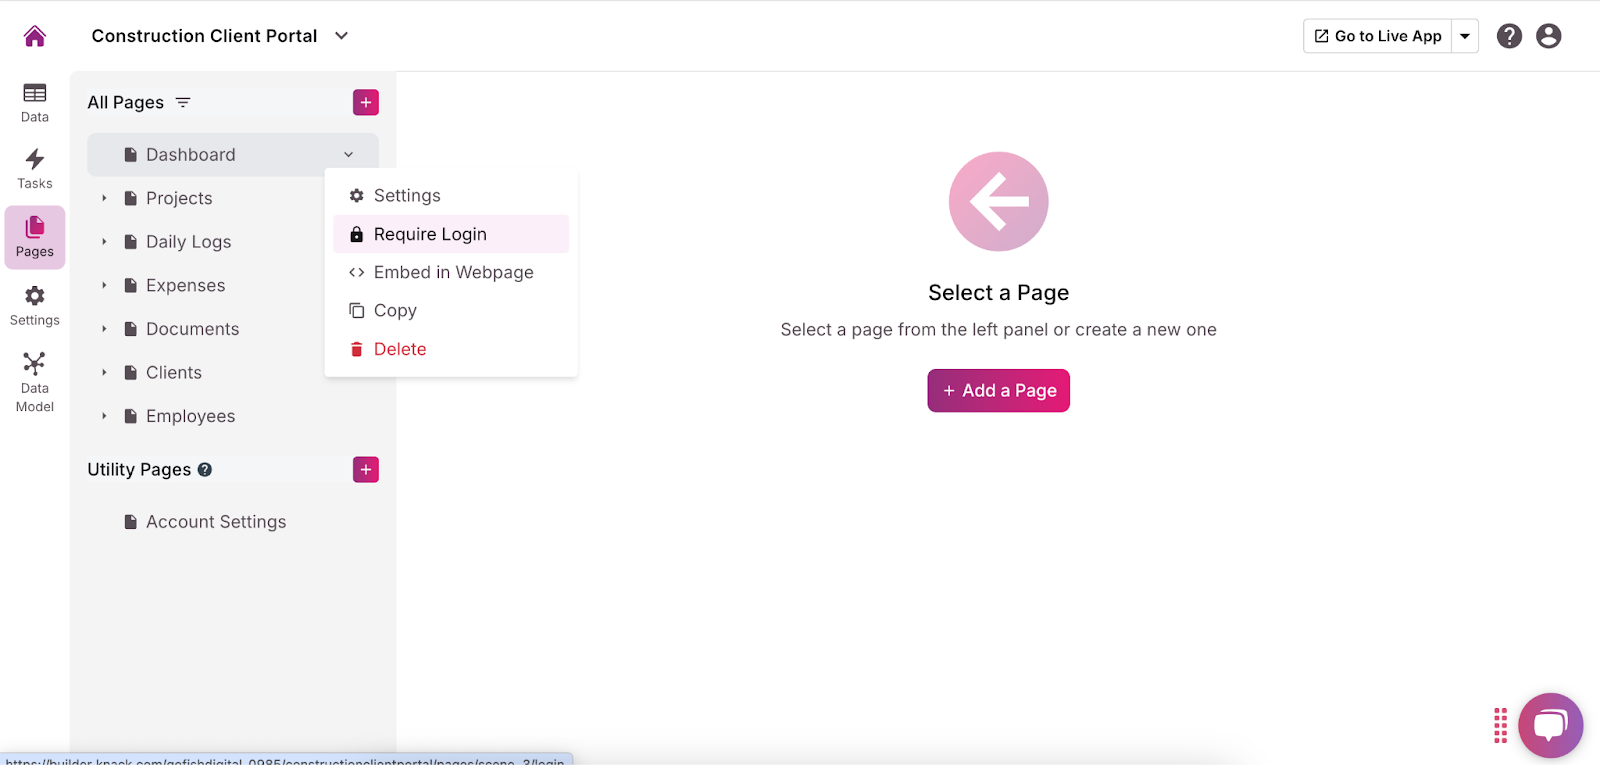
- Customize the user roles and permissions for each page by clicking the dropdown arrow and selecting “Require Login.” This allows you to choose who can access what information and functionalities. We recommend requiring all users to have a secure login to protect any sensitive information stored in the portal.
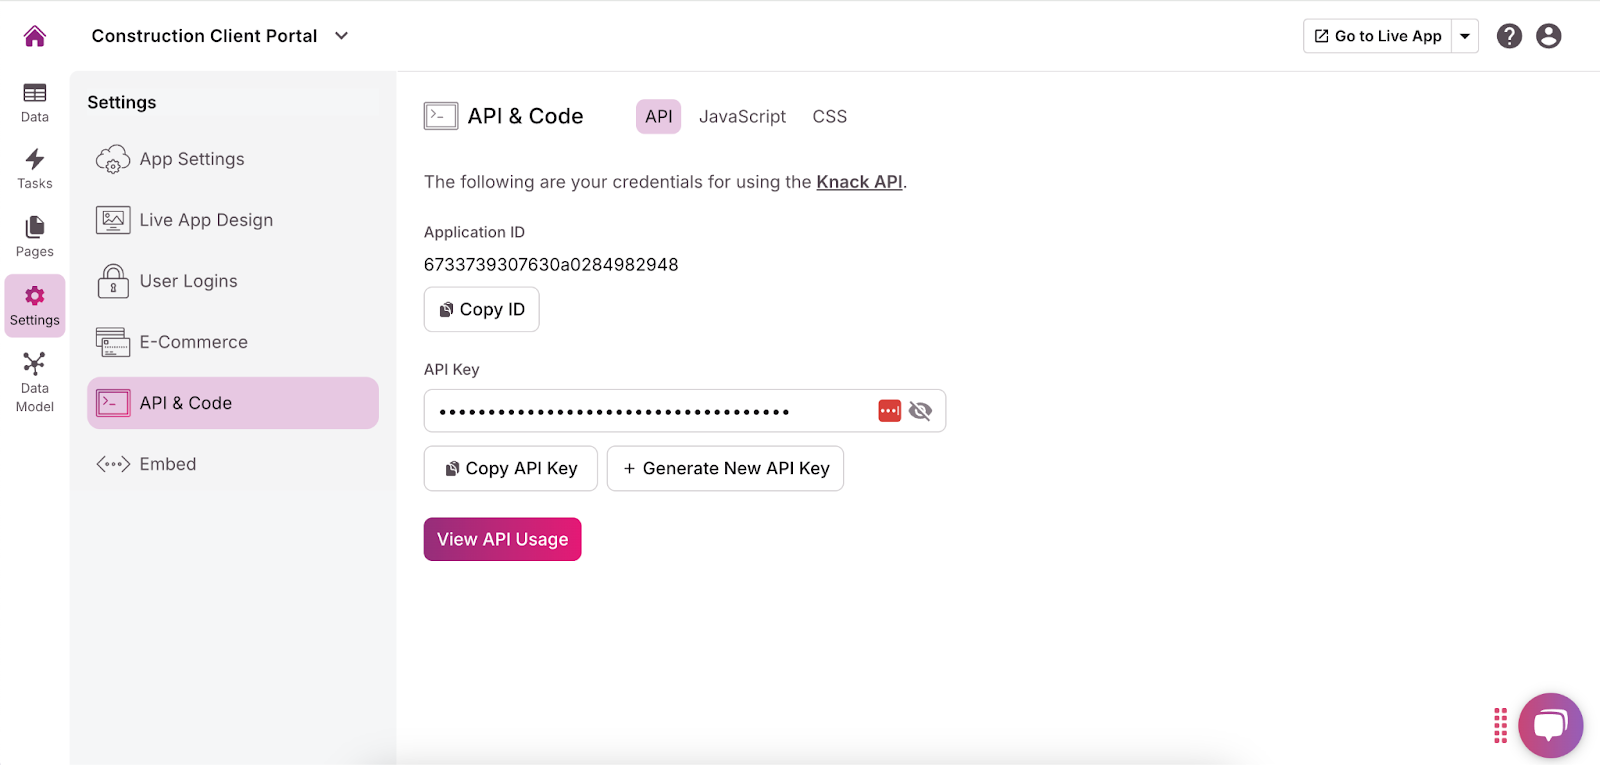
- Add any necessary integrations using the “API & Code” option in the “Settings” menu. For more guidance, read this Introduction to the API article.
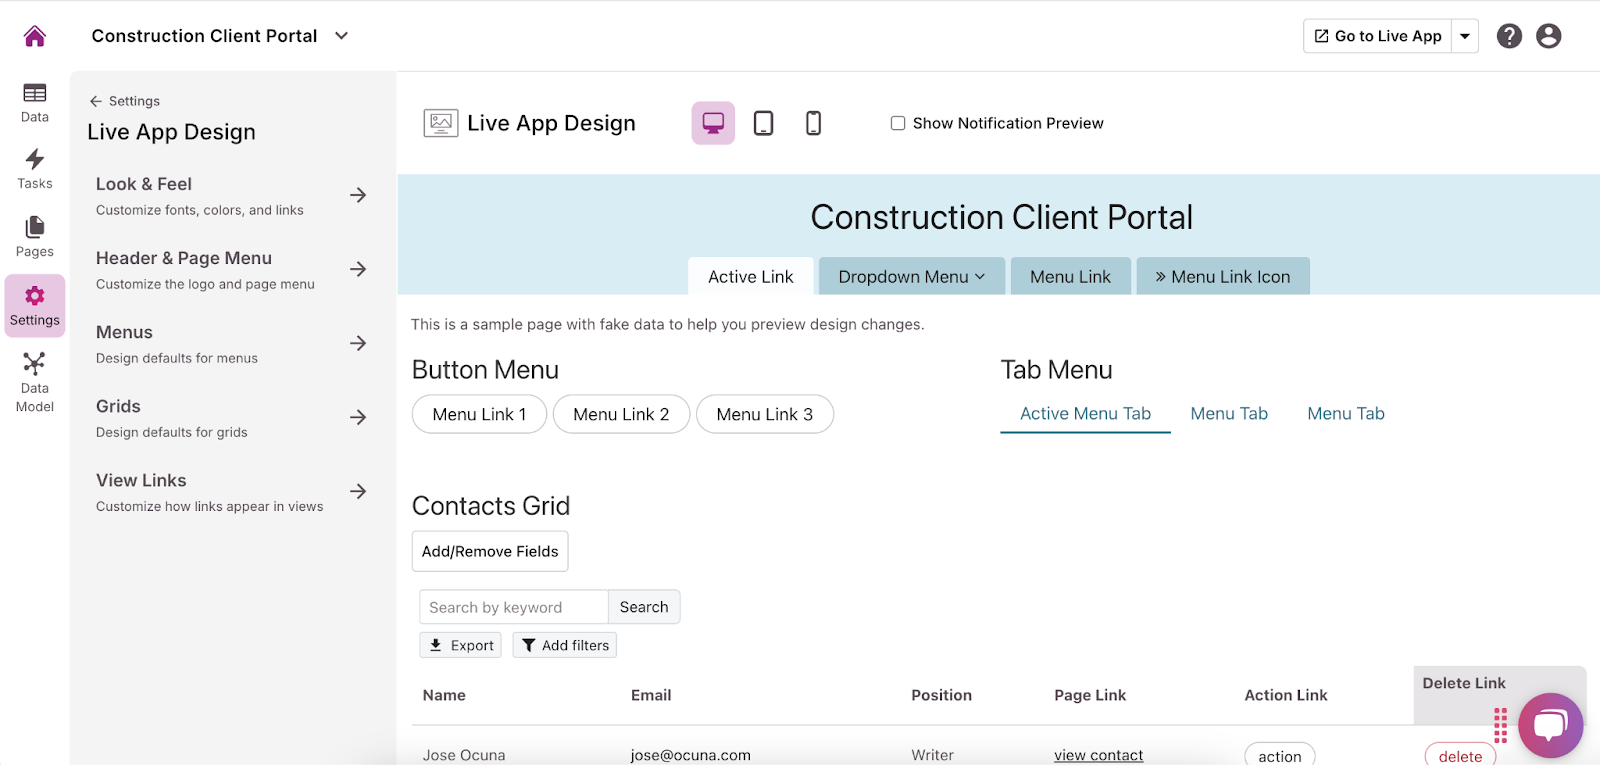
- In the menu on the left side of the builder, click “Settings” and then “Live App Design” to customize the user interface. You can add your company logo, change fonts, select colors, and more to make the portal fit your brand.
Option 2: Use a Template
If the AI-builder doesn’t seem like the right option for building your construction client portal, try one of Knack’s free app templates. For this project, we recommend our Client Portal Template.
- In the top right corner of the app-builder dashboard, click “Create New App” then “Start from template app.”
- Choose the template that best matches your needs and select “Create App.”
- Explore the template components and edit them to meet your requirements. You can edit, add, or remove tables, fields, connections, pages, and views using the menu on the left.
- Customize the user roles and permissions for each page by clicking the dropdown arrow and selecting “Require Login.” This allows you to choose who can access what information and functionalities. We recommend requiring all users to have a secure login to protect any sensitive information stored in the portal.
- Add any necessary integrations using the “API & Code” option in the “Settings” menu. For more guidance, read this Introduction to the API article.
- In the menu on the left side of the builder, click “Settings” and then “Live App Design” to customize the user interface. You can add your company logo, change fonts, select colors, and more to make the portal fit your brand.
Option 3: Build from Scratch
If you want more control over your construction client portal from the get-go, you can build it from scratch—still without any coding! Follow these simple steps:
- In the app-builder dashboard, select “Create New App” in the top right corner, then click “Start from scratch.”
- Using the menu on the left, build tables, add fields, create connections, add pages, and choose views. These will store and display all content and data for users, so be sure to name everything clearly and choose views that are easy to understand. We recommend adding a form view so clients can upload documents.
- Customize the user roles and permissions for each page by clicking the dropdown arrow and selecting “Require Login.” This allows you to choose who can access what information and functionalities. We recommend requiring all users to have a secure login to protect any sensitive information stored in the portal.
- If applicable, add integrations using the “API & Code” option in the “Settings” menu. For more guidance, read this Introduction to the API article.
- In the menu on the left side of the builder, click “Settings” and then “Live App Design” to customize the user interface. You can add your company logo, change fonts, select colors, and more to make the portal fit your brand.
Tips for Testing Your Client Portal
Before launching a construction client portal, thorough testing is essential to ensure it meets both client expectations and project management needs. Here are some key tips to guide your testing process and help identify any areas for improvement:
- Test for User-Friendliness: Ensure the portal is intuitive and easy to navigate, especially for clients who may not be tech-savvy. Test for clear labeling, logical organization, and straightforward navigation.
- Check Real-Time Updates: Confirm that real-time updates, notifications, and document uploads function smoothly. This ensures that clients will consistently receive up-to-date information without delays.
- Validate Document Security: Test the security of document-sharing features to protect sensitive files. Verify that only authorized users can access, upload, and download documents.
- Ensure Mobile Compatibility: Many clients may access the portal from mobile devices, so test the portal on various screen sizes and operating systems to confirm a seamless mobile experience.
- Simulate Client Interactions: Perform tests that mimic client interactions, such as submitting questions, viewing updates, or downloading files. This helps ensure the portal responds accurately to common user actions.
- Test Budget and Expense Tracking: Check that budget tracking features update in real-time and reflect correct amounts. Ensure that expense reports, summaries, and tracking tools are accurate and interpretable.
- Conduct Payment Security Tests: If the portal includes billing, test the payment process for secure transactions. Ensure that clients can view invoices and make payments without any technical or security issues.
- Gather Feedback from Beta Users: Consider a beta test with a small group of trusted clients to identify any issues from the client’s perspective and make final adjustments based on their feedback.
Build Your Construction Client Portal Today
Ready to wow your clients with a custom portal? Sign up for Knack and start building for free today!
