 Log In


- Features & Benefits
- AI Powered App-Building

Leverage Knack AI to expedite your new app with just a few sentences and save hours of time.
- Security and Infrastructure
Safeguard data, control access, and ensure robust system reliability for peace of mind.
- Data Management
Organize, import, and manipulate data efficiently to make informed decisions and drive success.
- Integrations
Integrate data and workflows to enhance productivity and expand functionality effortlessly.
- Reports
Analyze data, create charts, track performance, and make data-driven decisions with ease.
- User Access
Control permissions, grant or restrict access, and ensure data security effortlessly.
- E-commerce
Sell products, manage inventory, and process payments smoothly for your e-commerce business.
- Front-End Experience
Design your app with the best experience for your users and appearance for your brand.
- Workflow
Automate data handling, trigger notifications, and simplify actions for efficient operations.
- Forms
Effortlessly build forms to collect data, leads, orders, and more.
- AI Powered App-Building


- Dive into Knack
- Template Apps
Expedite your app build with a pre-built template.
- Blog
Discover valuable insights and tips.
- Case Studies
Read Knack success stories.
- Spreadsheet Templates
Download and use a spreadsheet template.
- Videos
Watch testimonials, tutorials, & expert reviews.
- Template Apps
- Additional Resources
- Compare Knack
See why Knack is the best option.
- Hire an Expert Builder
Find an expert to build or expand your app.
- Learning Center
Learn about how to set up and expand your app.
- Developer Docs
Find comprehensive guides and documentation.
- Community Forum
Discuss your build with other Knack builders.
- Compare Knack
- Partner Programs
- Become An Affiliate
Increase your revenue with Knack.
- Become an Expert Builder
Get hired to build and expand apps.
- Agency Program
Resell Knack apps to clients.
- Become An Affiliate


Creating a scheduling form can seem like a daunting task, but with the right tools, it’s simpler than you think. Whether you’re managing appointments, streamlining team coordination, or organizing events, having a reliable and customizable scheduling form can make all the difference. In this guide, we’ll show you how to use Knack’s intuitive no-code platform to create a scheduling form that fits your specific needs—no technical expertise required.
Key Takeaways
- A scheduling form organizes construction activities, resources, and timelines to ensure project efficiency. Common use cases include project timelines, resource allocation, and task tracking.
- You can use Knack’s AI App Builder to generate a basic scheduling form and customize it to meet project-specific needs without any coding skills.
- Although scheduling form components vary by purpose, they generally include project details, task schedules, assigned resources, and timelines.
What is a Scheduling Form?
A scheduling form is a tool designed to organize and manage time, tasks, and resources efficiently. It provides a clear, structured way to stay on task and maintain productivity. Scheduling forms can be customized to suit different industries and goals. Here are a few examples of how scheduling forms are commonly used:
- Resource Scheduling Forms: These forms help allocate essential resources like equipment, materials, and labor to ensure availability and avoid conflicts. For instance, a construction team might use a resource scheduling form to track tool usage or assign crew members to specific projects.
- Project Timeline Forms: These forms, designed to set project phases and deadlines, allow teams to establish a roadmap for completing a project. By visualizing start and end dates for each phase, teams can identify potential bottlenecks and adjust timelines accordingly.
- Task Management Forms: Ideal for tracking individual tasks and progress, these forms help teams stay organized by assigning responsibilities, setting priorities, and monitoring completion rates. For example, a marketing team could use a task management form to keep track of campaign deliverables and deadlines.
The Importance of a Well-Structured Scheduling Form
A well-structured scheduling form is more than just a time-management tool—it’s key to maintaining organization, boosting efficiency, and ensuring accountability. A clear and intuitive layout helps users focus on what matters most, minimizing confusion and reducing errors. Moreover, when a scheduling form is tailored to your team’s specific workflow, it fosters collaboration and helps everyone stay aligned toward shared goals. In short, the better your scheduling form, the smoother your operations will run.
How to Create a Scheduling Form With Knack
Knack is a no-code platform that enables users to build custom scheduling forms using pre-built components and drag-and-drop functionality rather than writing code. The intuitive interface makes creating a scheduling form quick and easy, even for those with little to no technical skills.
This tutorial will give you step-by-step directions for building a stunning, functional scheduling form using Knack. If you need additional guidance, check out our learning center and developer docs.
Before diving in, make sure you sign up for a free 14-day trial so you can follow along.
Method 1: Building a Scheduling Form with Knack’s AI App Builder
Looking for a quick way to get your project off the ground? Try Knack’s AI app builder—it’s simple!
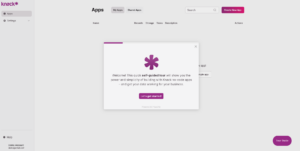
- From the app builder dashboard, click “Create New App.”
- Select “Generate with AI.”

- In the pop-up, enter a prompt that details the scheduling form you want to create. For example, “A resource scheduling form for equipment, tools, and materials for a commercial construction project.”

- The AI will suggest an initial scheduling form structure. Explore it and make note of any changes you want to make.

- Use the menu on the left to customize the AI-generated form. You can add, edit, or remove fields, tables, names, and connections. We recommend having a dropdown in your form that lists resources for your team to choose from, as well as fields for employee name, date of request, resource usage date, project ID, and labor hours. You can change these as needed to fit your project.

- If a page does not already exist for the scheduling form, click “Pages,” then select the purple + next to “All Pages.” Choose “Public Page,” name it something relevant to your form (ex. Resource Tracking Sheet), and click “Add Page.”

- Next, select “Form” under “Add a View.” Select the table you want to connect it to (the scheduling form you created). Your team members will use this page to access the scheduling form.

- In the menu to the left, click “Settings” and “Live App Design” to customize the appearance of your scheduling form and page. You can change fonts and colors and add your logo to make the form and page match your branding.
Method 2: Building a Scheduling Form with a Knack Template
If the AI builder doesn’t seem like the right fit for your scheduling form, try one of Knack’s free template apps. We have a library of scheduling form templates that are a great place to start, like the Job Scheduling Template, Patient Scheduling Template, and Production Scheduling Template.
Here’s how to do it:
- From the app builder dashboard, click “Create New App.”
- Select “Start from a Template,” then browse the template library until you find one that meets your needs.
- Explore the template structure and make note of any changes you want to make.
- Use the menu on the left to customize it. You can add, edit, or remove fields, tables, names, and connections. We recommend having a dropdown in your form that lists resources for your team to choose from, as well as fields for employee name, date of request, resource usage date, project ID, and labor hours. You can change these as needed to fit your project.
- If a page does not already exist for the scheduling form, click “Pages,” then select the purple + next to “All Pages.” Choose “Public Page,” name it something relevant to your form (ex. Resource Tracking Sheet), and click “Add Page.”
- Next, select “Form” under “Add a View.” Select the table you want to connect it to (the scheduling form you created). Your team members will use this page to access the scheduling form.
- In the menu to the left, click “Settings” and “Live App Design” to customize the appearance of your scheduling form and page. You can change fonts and colors and add your logo to make the form and page match your branding.
Method 3: Building a Scheduling Form from Scratch
Want more control over your scheduling form from the get-go? Try building it from scratch—still without any coding!
- From the builder dashboard, click “Create New App.”
- Select “Start with a Blank App.”
- Under the “Data” tab, click the purple + next to “Tables.” Name your table, and add relevant fields to it. We recommend having a dropdown in your form that lists resources for your team to choose from, as well as fields for employee name, date of request, resource usage date, project ID, and labor hours. You can change these as needed to fit your project.
- Once your scheduling form table is complete, click “Pages,” then select the purple + next to “All Pages.” Choose “Public Page,” name it something relevant to your form (ex. Resource Tracking Sheet), and click “Add Page.”
- Next, select “Form” under “Add a View.” Select the table you want to connect it to (the scheduling form you created). Your team members will use this page to access the scheduling form.
- In the menu to the left, click “Settings” and “Live App Design” to customize the appearance of your scheduling form and page. You can change fonts and colors and add your logo to make the form and page match your branding.
Key Components of a Scheduling Form
Every component of a scheduling form plays a vital role in providing clarity, maintaining organization, and fostering collaboration. Although every scheduling form will differ to match its purpose, they generally include the following:
1. Project Information
Every scheduling form should begin with essential project details to provide context for all users. This section ensures everyone understands the schedule’s scope and focus and eliminates confusion across teams.
- Project Name: Identifies the specific project the schedule belongs to.
- Project ID: Offers a unique identifier for easy tracking and reference.
- Location: Specifies where the project or task will take place.
- Client Details (optional): Adds an extra layer of organization by linking the schedule to a client or external stakeholder.
2. Task Details
Tasks are the backbone of any scheduling form. Including this section allows teams to break down projects into manageable steps, assign responsibilities, and monitor progress effectively.
- Task Name: Clearly identifies the activity or step.
- Description: Provides additional details or instructions for completing the task.
- Assigned Team or Personnel: Ensures accountability by specifying who is responsible for the task.
- Status: Tracks the task’s progress with labels like Pending, In Progress, or Completed.
3. Timeline
A well-defined timeline is critical to keeping projects on track and meeting deadlines. This section helps establish clear expectations and highlights important milestones.
- Start and End Dates: Set clear boundaries for when a task or project begins and ends.
- Milestone Deadlines: Identify key dates for achieving specific goals to maintain steady progress.
4. Resource Allocation
Effective resource management is essential for avoiding bottlenecks and ensuring that your team has what it needs to succeed. It typically includes things like:
- Labor Hours: Tracks the time required for each task or phase.
- Equipment: Allocates tools or machinery needed to complete the project.
- Materials: Ensures that supplies are accounted for and available when needed.
5. Notes and Instructions
This section provides space for additional details that don’t fit neatly into other categories. It’s especially useful for clarifying complex tasks or addressing unique requirements.
6. Approval Section
An approval section is essential for maintaining accountability and ensuring that all stakeholders are aligned. This is particularly valuable for larger projects or those requiring oversight.
- Signatures for Schedule Approval (if required): Provides a formal confirmation that the schedule has been reviewed and approved by the necessary parties.
Create a Scheduling Form with Knack
Ready to organize and empower your team with a custom scheduling form? Sign up with Knack and start building for free today!


